-
Your shopping cart is empty!

MENU
Your shopping cart is empty!
Simply spray very fine coats of the colour onto the item after masking off areas you don’t want re-colouring. The coats should be so fine that your first coat only produces speckles, continue building up the speckles to completely cover the area with colour, this usually takes 3-5 separate sprays with around 10 minutes drying time between sprays. It is recommended that you always spot test an inconspicuous area of each material first, allowing that to dry completely to a final finish.
The item(s) must be very clean to allow the dye to bond we recommend our TRG Universal Cleaner, as this will not leave any residue and is very strong, while gentle enough to be used on anything, including real leather. (It also works wonders on metal, car dashboards and car metal exteriors and interiors we've been told many times)
You may use acetone (Acrylic Nail Polish Remover), available from Superdrug or similar if the item is very soiled; be careful that the acetone doesn't damage your item though, so spot test this.
For vinyl items, acetone is can be too harsh, use our TRG Universal Cleaner.
For leather items, acetone is usually too harsh, use our TRG Universal Cleaner.
For plastic items, you may need to gently sand the surface. Many plastics have a 'sheen' or 'layer' on the top, this is actually part of the moulding process and helps the item to be removed from its mould, this needs removing as the dye can not penetrate it.
Do not use white spirit it will leave a residue and prevent the dye from bonding with the item. Do not use decorators soap crystals.
Shake the can. Then Shake the can some more. If your arm isn't aching, you've not shaken it enough. Well maybe. Shake the can for at least 10 minutes the first time you use it.
Continue mixing the paint in the can between sprays occasionally by swirling the bottom of the can, keeping the top as stationary as possible. Yes really, it is that important you shake the can to really mix up all the chemicals. So even between layers (see image below), you must swirl the can. Why swirl and not shake? If you get some of the dye on the ridge of the can, you don't want it flying off onto your item and leaving it with drips.
Number one tip: Shake the can MORE than you think is necessary at first before using the can.
Number two tip: Spray only VERY FINE layers, to build up a single coat. This allows the dye maximum opportunity to penetrate the material, rather than sitting on top of itself.
Apply around 4-6 layers of spray. That is, the first spray is only like putting spots on a Leopard, allow to fully dry, this could take up to 20 mins but if outside usually 10. Then the 2nd spray is adding more spots, but you can still see the original material until you get to the 4th or 5th layer, where you won't be able to see the original material.
Number three tip: Do not spray in extreme temperatures. That is you should ideally be applying your spray at room temperature or thereabout (15 - 24 degree Celsius). It has been known for high temperatures to affect the dyes, do not use at over 26 degrees Celsius, if you do, as always, spot test.
Final tip: Spot test. Ensure you are completely happy with the finish prior to undergoing a complete job or project. It is extremely rare that the dyes don't work, less than a half of one per cent of our customers report back the dye didn't work for them, but if they miss this tip, they can remove the dye (because the dye didn't bond, hence not working), but it takes longer than it would have to remove a spot test.

Choose the finish you'd like to keep. From High Gloss to a deep Matt.
Usually the Vinyl Dyes dry to a satin finish, sometimes closer to Matt, sometimes closer to Gloss. This does depend on the item and the colour is chosen and how you perceive it.
Finishing is simple, just a single layer of spray is usually enough, use two or more if you know it's under high wear.
We have tested both of our recommended finishers.
You can spray our Vinyl Dye sprays over the Gloss and the Matt sprays again. So if you change your mind about colour, that's still an option even when a finishing spray has been used.
Want a Matt Finish? Use our Matt Clear Varnish 'Topper', we've tested it and it's fantastic, but like always, please spot test.
Want a Gloss Finish? Use our High Gloss Varnish 'Topper', we've tested it and it's fantastic, but like always, please spot test.
Wanted Satin? Most items dry to a satin naturally, so no need for a topper.
Before completing a project, you should patch test a small area, and wait at least 24 hours until you are completely happy with the finish. If you're not happy with the finish/colour or whatever for any reason after the patch test, it's unlikely that completing the whole project is going to change your opinion. Our money-back guarantee counts for 1 of each type of product, e.g. 1 vinyl dye can so you've plenty to get a good and complete patch test.


")
First of all, you can have any finish you want, we have every product you need available to produce the exact result you want, and we've tested them all for compatibility too, so rest assured, if you buy the products from us, on our website, you're in good hands.
Most of the time Vinyl Dye Sprays dry to a satin finish. Rarely, but it can, change depending on the object being sprayed. As such we always recommend spot testing to completion to check you're 100% happy with the finish.
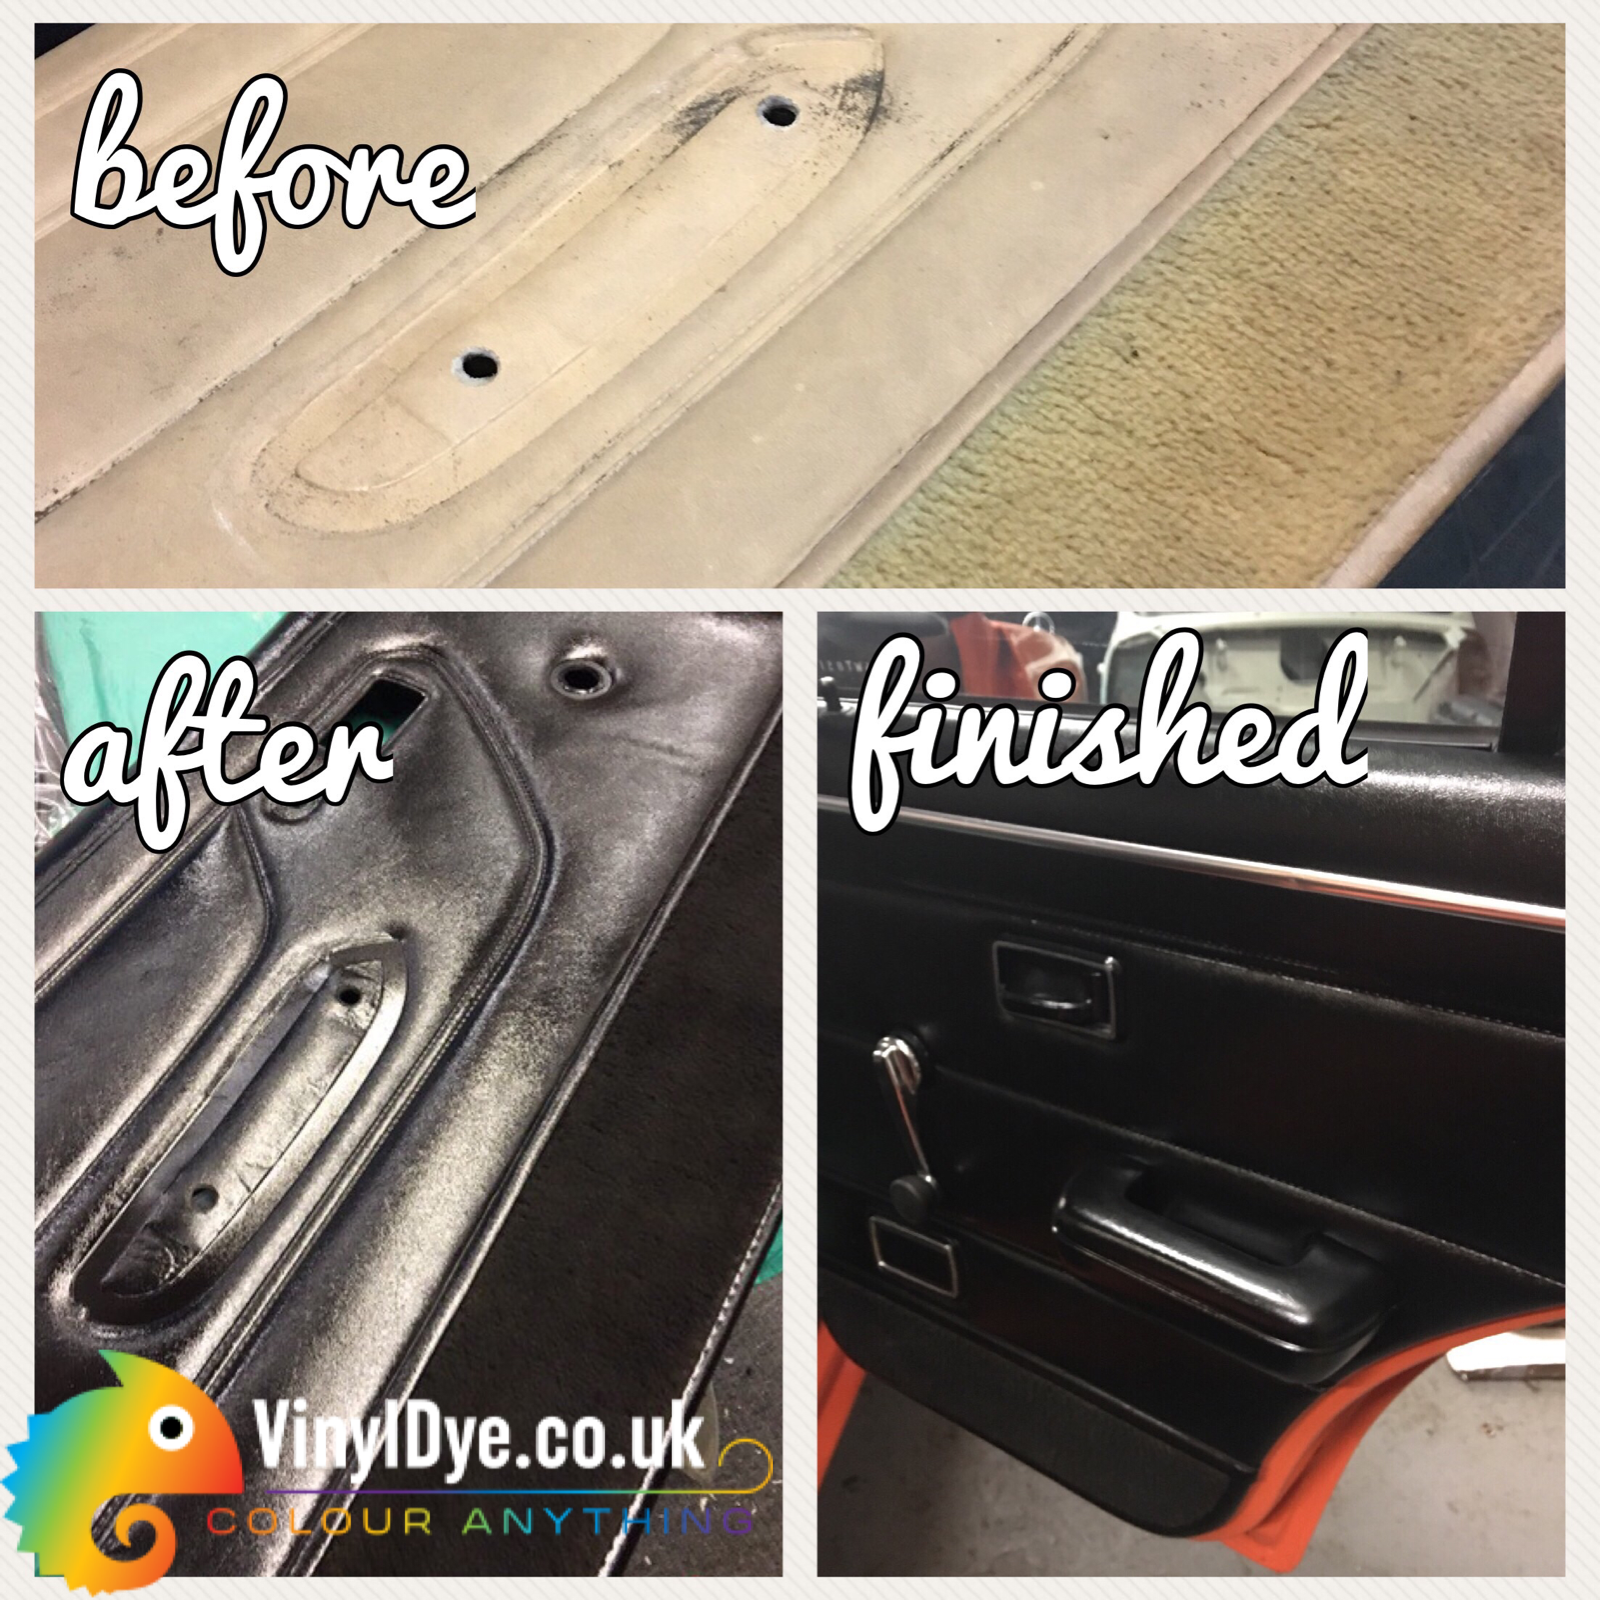
If you want a matt finish, ideal for Car Dashboards and making Vinyl Door Cards have their original finish. Adds extra protection too. Use our Matt Spray that we've tested to be compatible with all our Vinyl Dye Sprays here.
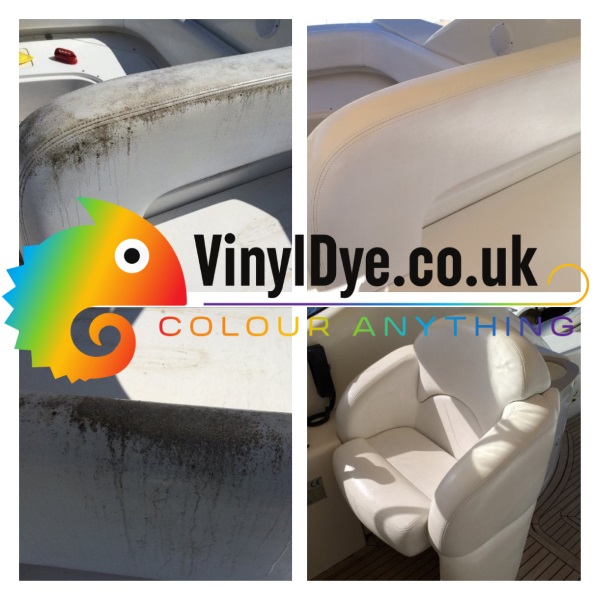
If you want a high gloss ginish, ideal for boat seating and many other settings, it adds a super shine and extra protection too. Use our High Gloss Spray that we've tested to be compatible with our Vinyl Dye Sprays here.
This does vary depending on your from and to colours slightly. For example, if you're going from Black to White, you'll get less coverage just because you'll really want to cover every microscopic part covered equally since you'll notice the underlying colour.
If you're going from a Beige to White, or from White to Red, it will take less, just because if you miss a part with one of your mist layers, you won't really notice, honest, we've done hundreds of projects, so it does make a difference.
So take these guides as a 'worst case' to 'best case' coverage and that should explain the differences.
A single 150ml can, best case scenario will cover up to 2.5 square meters in a situation where you're touching up the colour for example, or just moving from white to an off white.
For most situations you should think a single 150ml can will cover up to 1 square meter completely to the standard that will last many years and remain flexible and durable.
Taking the same explanation from above, a 400ml can will cover up 2.5 square meters completely, or around 6 square meters of touch ups or similar colours.
400ml cans are available in a small selection of colours including Black and White click here to see them.
Yes we can for the TRG branded items.
Yes we can certainly tell you the closest colour match.
Click here to see The Five Ways To Get Your Colour.
Don't forget, Include your email and or moble phone number, we'll email or text you the results and assist any way we can.
There is no real difference between the two brands of Vinyl Dye spray. They both produce fantastic results. We only have both brands since sometimes their colours differ, and other times we can supply greater quantities in one compared to the other depending on import delays etc.
For your information, we've been supplying Vinyl Dye sprays for oever 10 years now, and noticed that people with Car and Vehicle related projects prefer the TRG branded Vinyl Dye. Where as Movie, Wardrobe and Prop designers prefer the Brillo branded Vinyl Dye. Although universally, people choose the colour first, brand second.
Full returns details are here; essentially just send back any completely unused items back in a resalable condition within 30 days. You can send items back within 100 days but there are some small restocking fees involved.
Our Vinyl Dye Sprays work with fantastic results on vinyl, leather, many plastics, most rubbers, canvas and most carpets. Our Vinyl Dye Sprays will also colour wood and fabrics, but they will change the texture. Whatever you colour, even Vinyl, we highly recommend a spot test regardless.
When deciding to complete your project, thinking what your alternatives are, usually leads to Vinyl Dye being your best option. Paint wont flex when dry, so will certainly crack and standard clothing dye can't penetrate.
This makes Vinyl Dye your highest, most likely chance of succeeding with your project; especially when you are not sure what exactly the material is. It's also inexpensive, quick to spot test and has a great range of colours too.
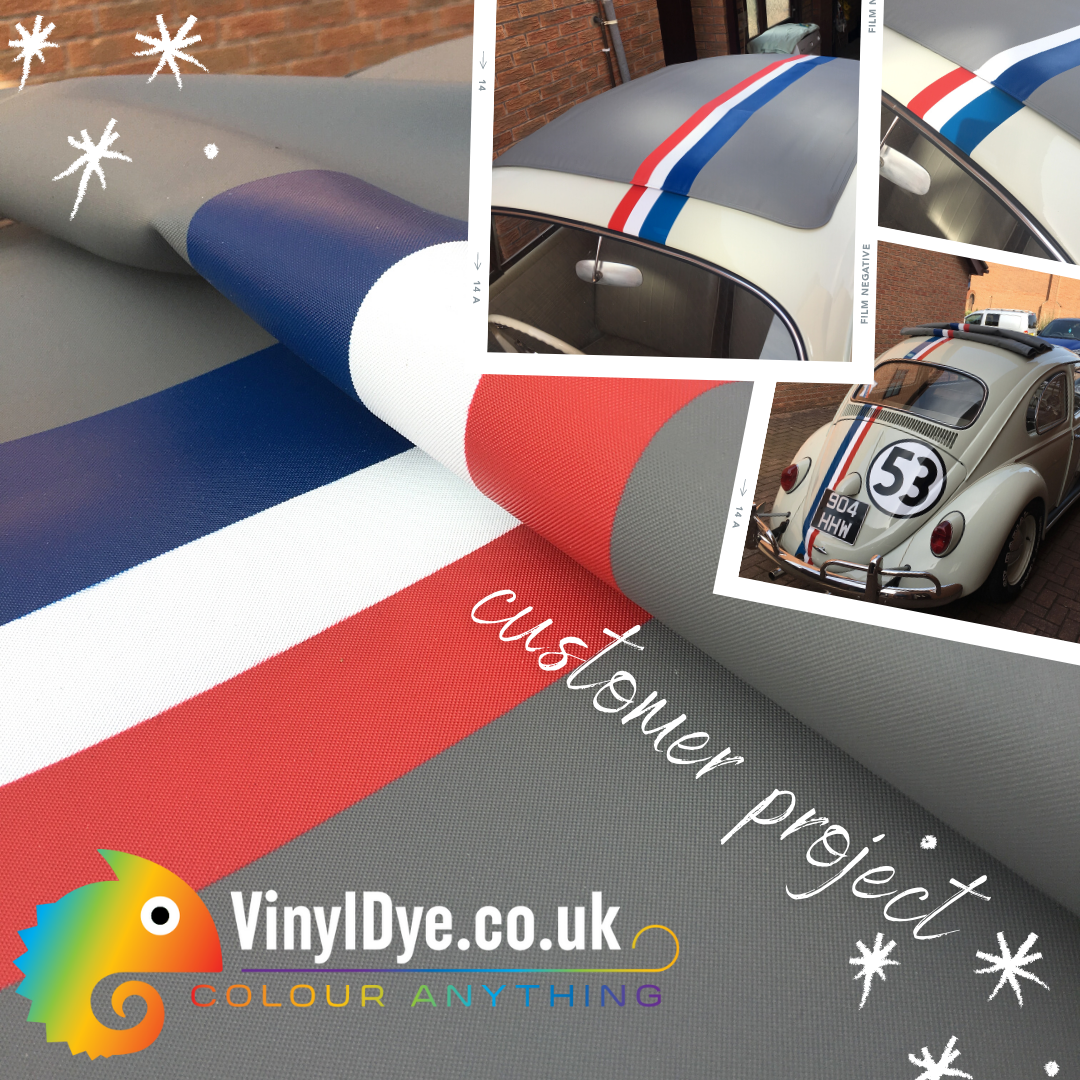
Our Vinyl Dye sprays have been used to renew and recolour many 1000's of hood and tonneau covers, not just for cars, but lorries and even canal boat hood covers. Each one with fantastic results and ended with a super happy customer.
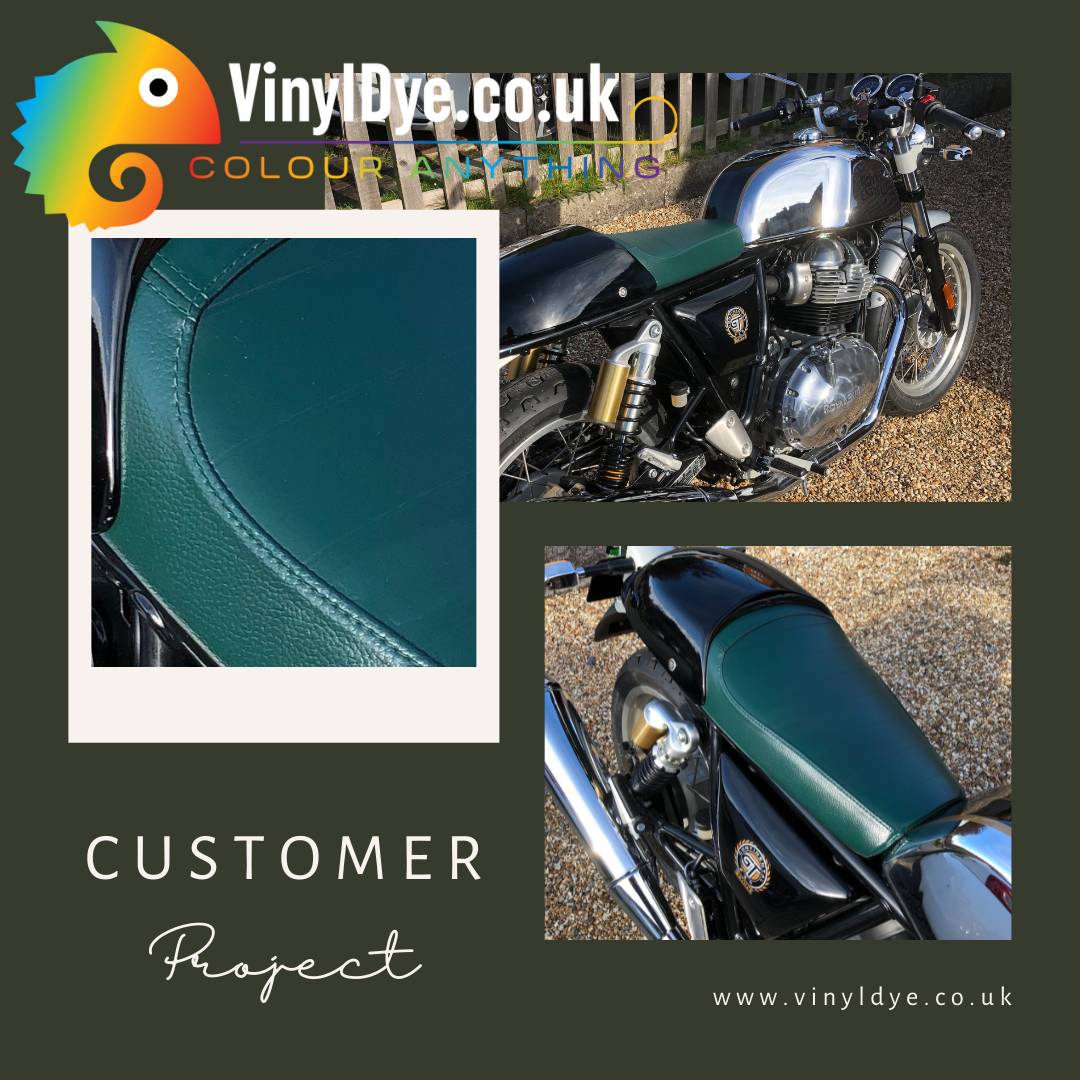
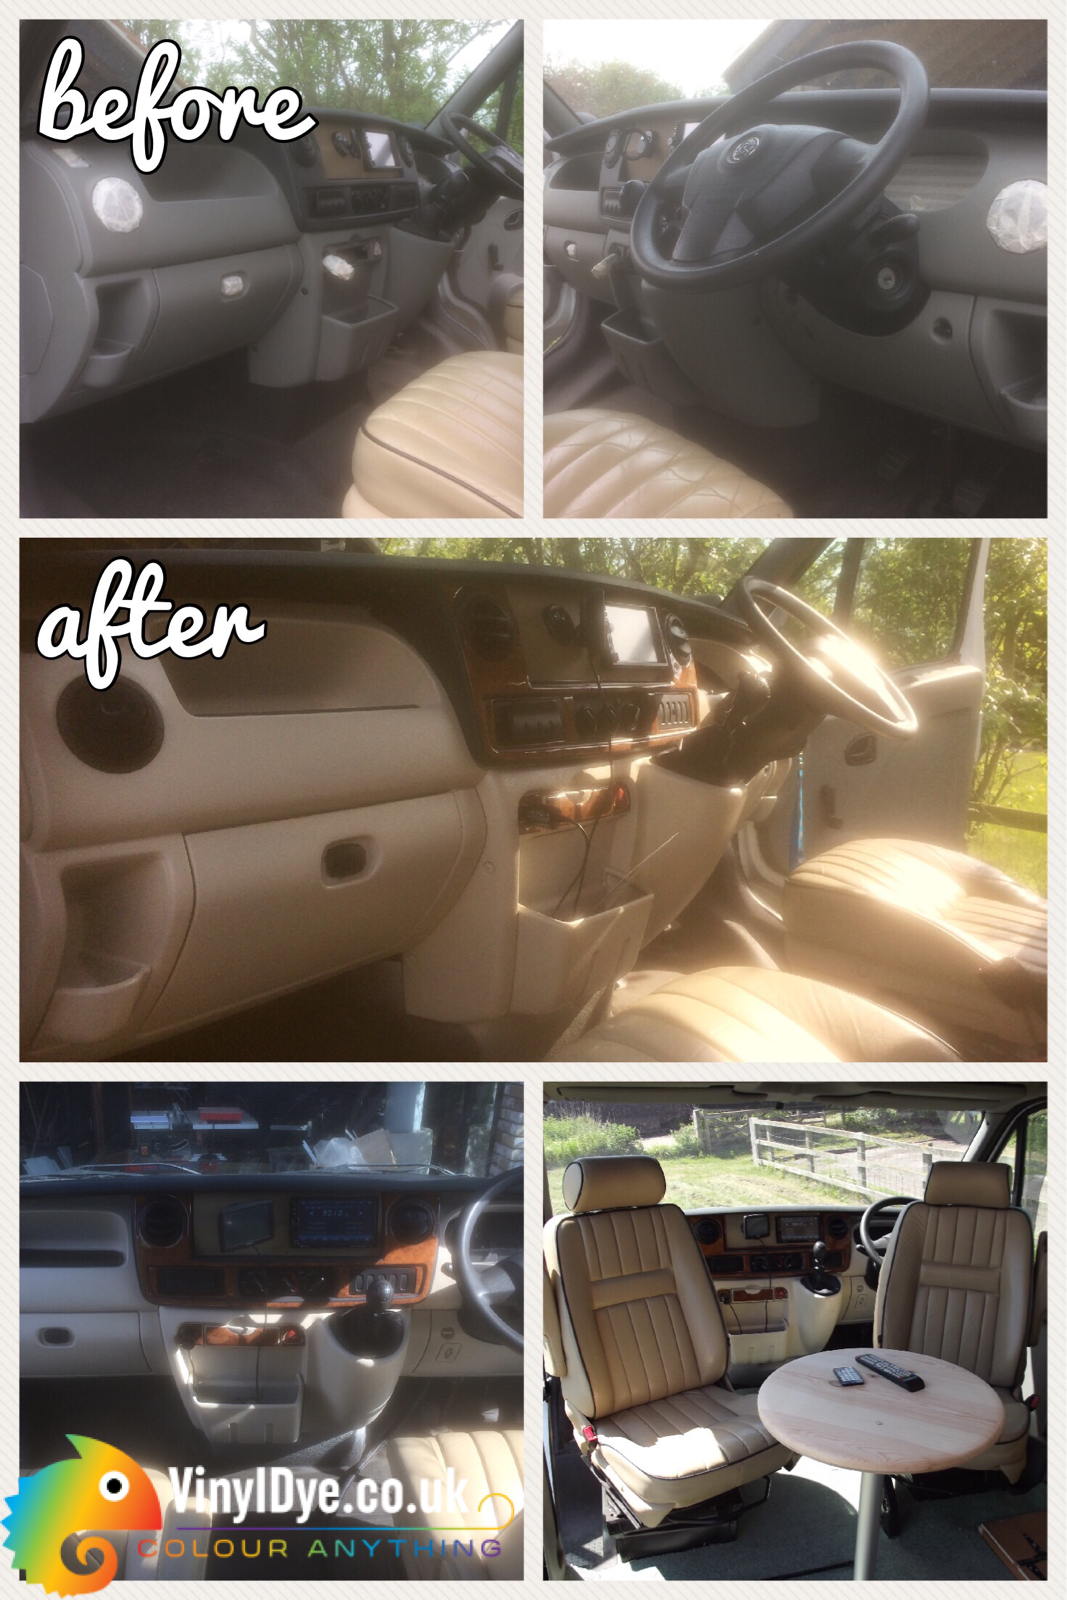
Take a look at the examples below, each one from a past customer, each one called 6-12 months later to check how it's wearing, and each one saying something along the lines of "exactly the same as the day I finished spray". One gentleman called 5 years later for an extra can to touch up an area he repaired; he was thrilled with the longevity and insisted had he not ripped this part, it would last many years to come more.
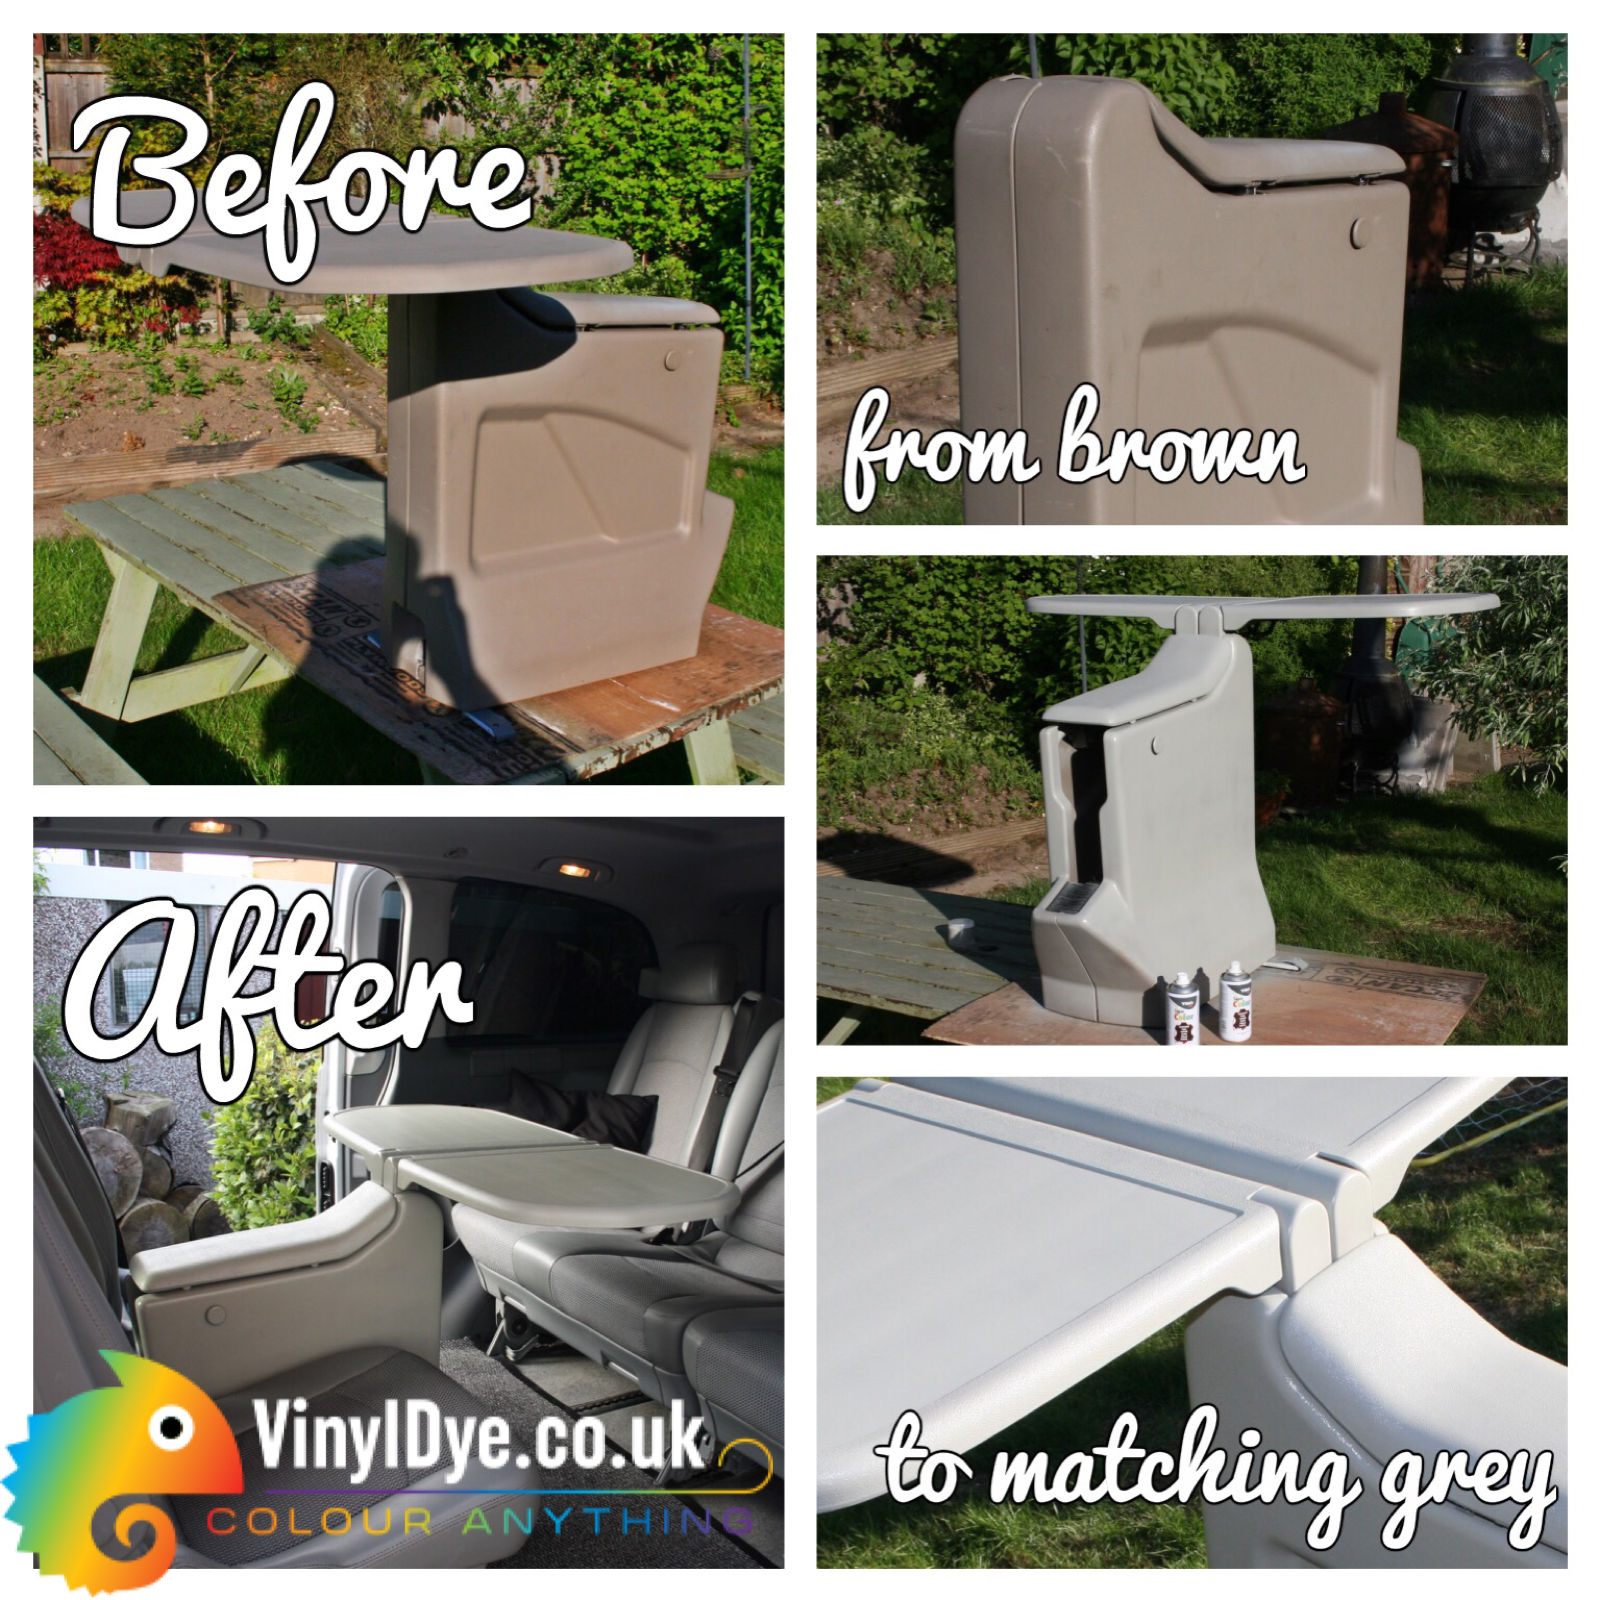
An example of a roll up roof recoloured using our Vinyl Dye sprays. This folding roof was originally beige, then completely coloured in our Grey, followed by our Scarlet, White and Blue Vinyl Dye sprays.

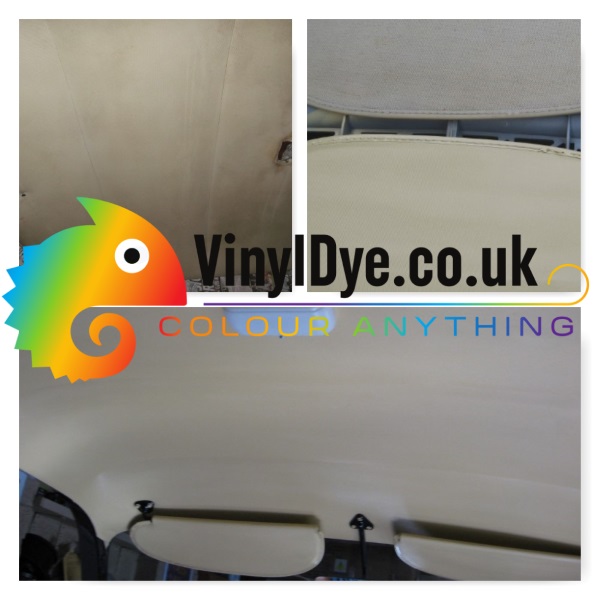
An example of a car tonneau cover completely recoloured using our Vinyl Dye sprays.

A canal boat hood restoration example from one of our past super happy customers after using our Vinyl Dye sprays.

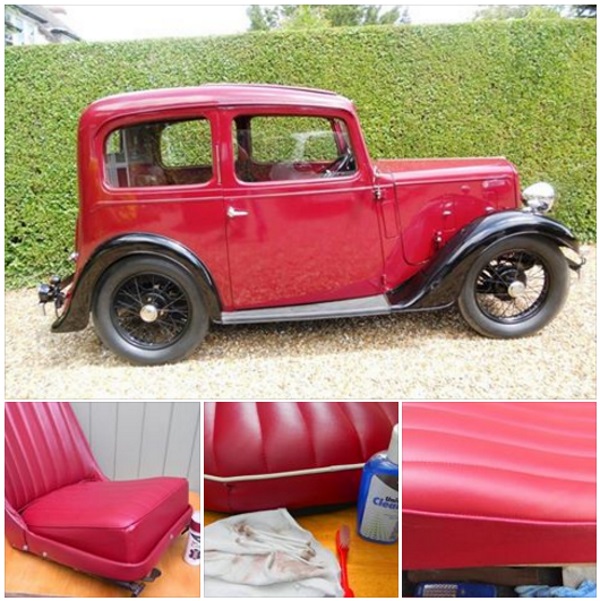
Many customers have requested this and they have resolved it by decanting the spray into a glass jar and then gently dabbing the dye onto the item.
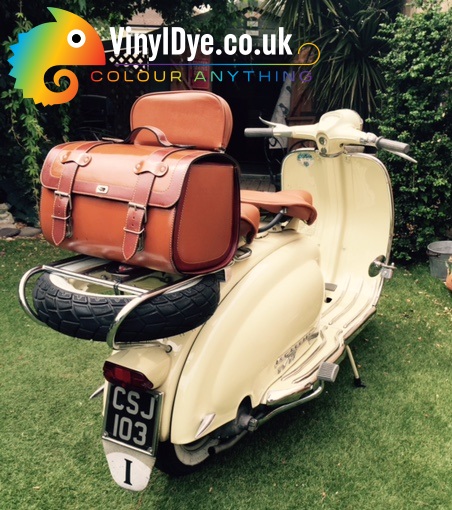
As an example see this 1938 Austin 7 Ruby seating. Here one of our super happy customers needed just the piping on a seat dying to match the brand new vinyl they just had fitted. (They were also astonished to find the piping was white!)

If you're dying a real leather item, then please look at our Easy Dye Kits which are sponge on liquid dyes.
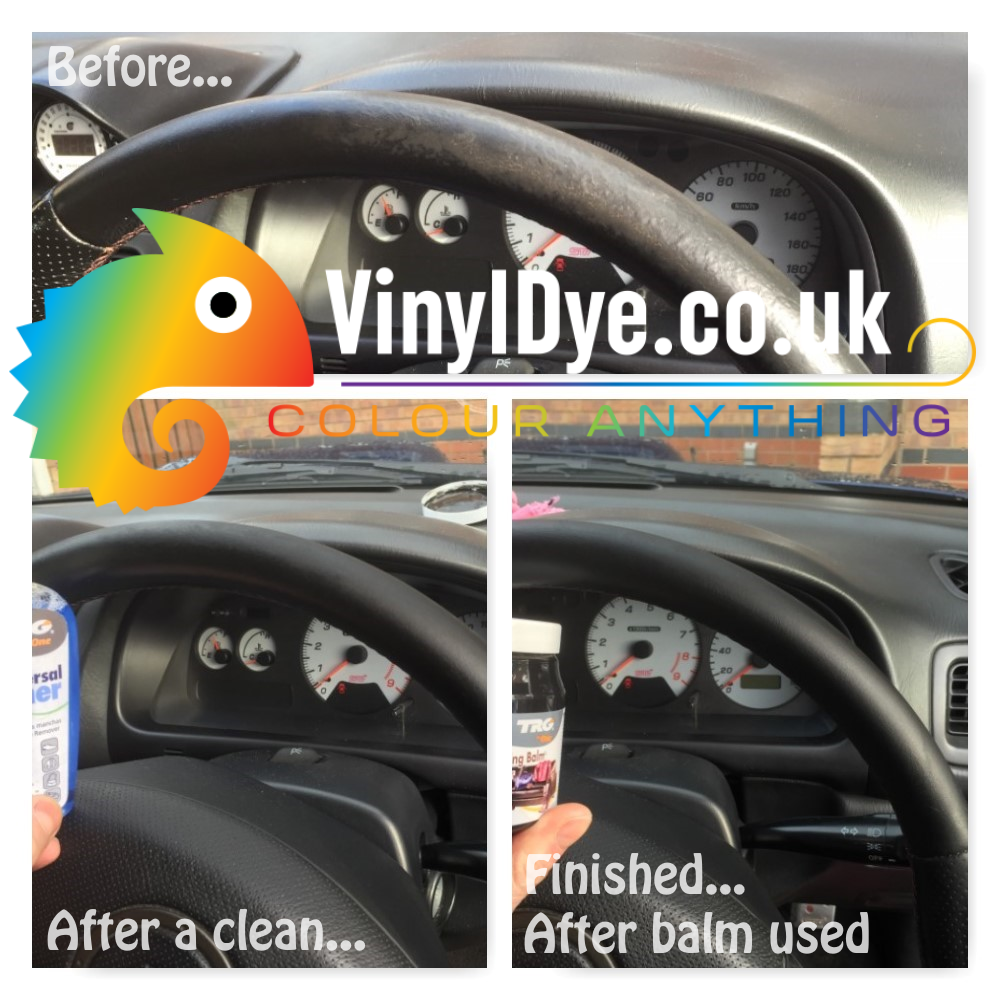
If you're simply restoring the colour, such as a faded patch, of real leather and not changing it, our Universal Cleaner then Leather Balms are best. These leather balms are wipe on and buff off. See here.
For Vinyl, or if you're not sure if it's real leather, then our Vinyl Dye sprays are really the best choice, even if it means dismantling the item, you'll end up with a long lasting, durable, UV resistant waterproof and flexible even when finished colour. As you can see in the above example, they can also be dabbed on, just be sure to spot test your approach and make sure you're happy with the finish and durability before undergoing the entire project.
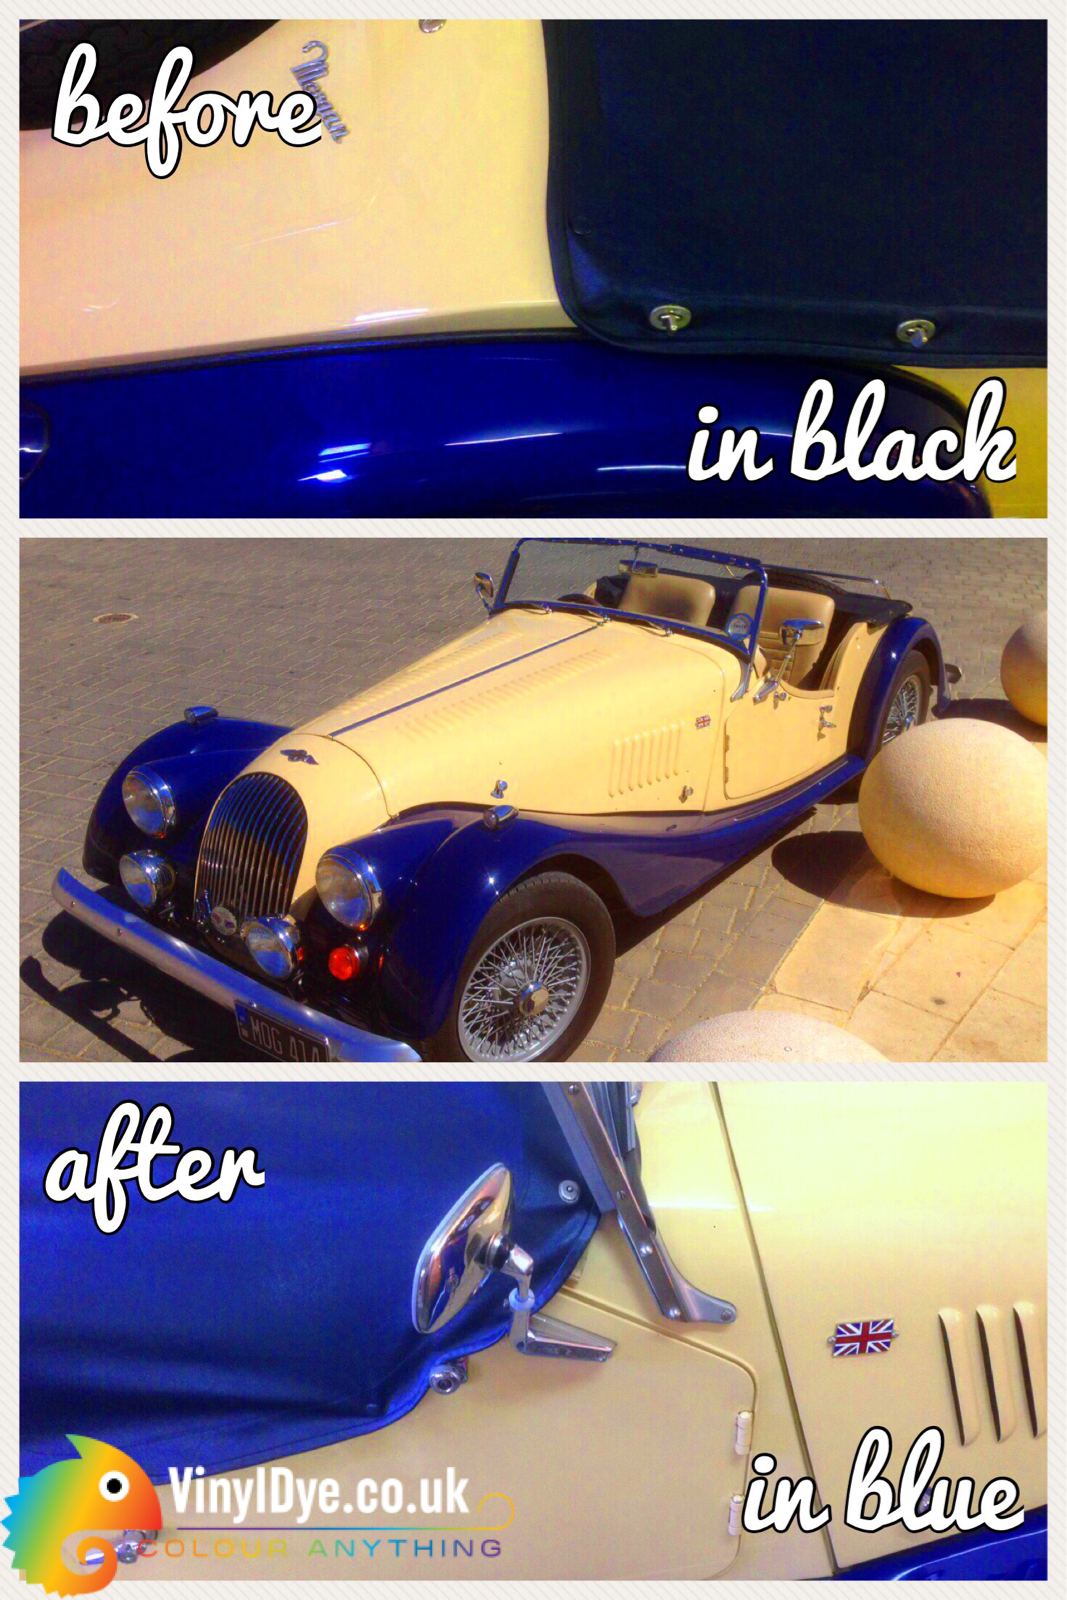
You can use good qulity masking tape and you will achieve perfectly clean lines with our Vinyl Dye sprays. Some customers have also used 'line tape' for larger projects. Take a look at this great example, where the grey base, red, white and blue are all sprayed onto of this flexible vinyl roof to wonderful effect.
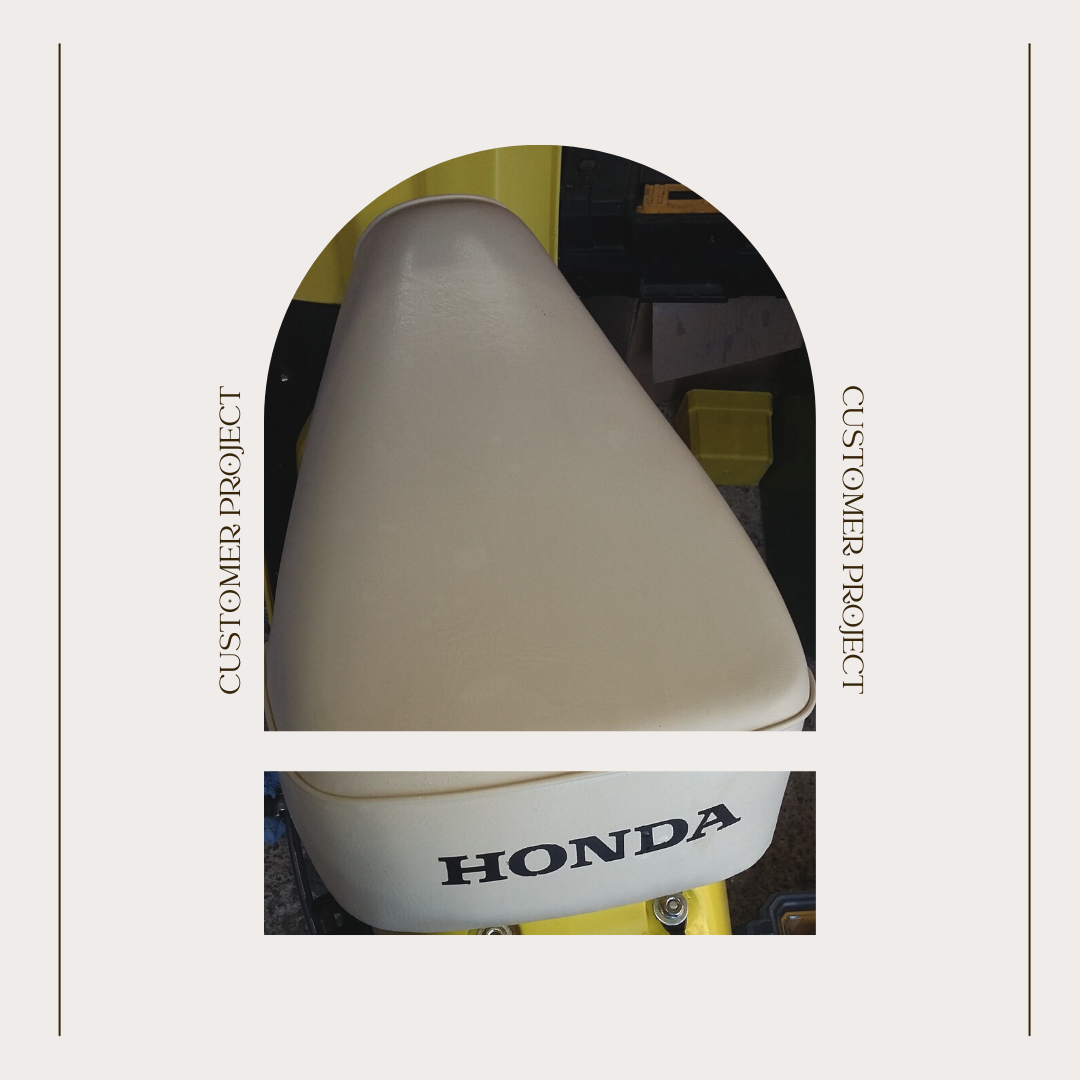
You can also construct a template to achieve the same, many people have done just this. Take a look at the below example where the lettering is from a template.

Tip: You'll need to leave the dye to dry for 24 hours if you are applying masking tape to an already dyed part. i.e. putting the tape on wet spray. After 24hours you can put tape on a sprayed area and it will not impact the finish at all.